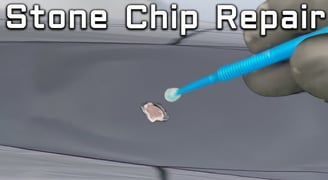
How to Fix a Paint Chip on Your Aircraft

Protect the Surface Before Corrosion Starts
Paint chips happen. They’re especially common on leading edges, around baggage doors, landing gear areas, and nacelle panels. Ignoring them allows moisture to creep in, which can lead to corrosion or peeling.
This is the method we use when repairing aircraft paint damage, along with a few hard-earned tips.
Step 1: Inspect the Damage
Walk around the aircraft and check high impact areas. Small chips often look like dull spots or tiny craters. If you catch them early, you can repair them before oxidation starts.
Tip
Use a flashlight at a low angle along the surface. This makes even shallow chips or flaking edges easier to see.
Step 2: Clean the Area Properly
Use aviation approved cleaning products to remove oil, grime, or wax near the chip. Avoid anything household grade. We use Wing Wipe Quick Detail Spray Sealant .You want the surface clean so the paint can adhere properly.
Hack
Use painter’s tape to mask a square around the chip. This protects surrounding paint from accidental sanding or overspray.
Optional
If working on the ramp, I sometimes use waterless aircraft wash to clean the area before and after the repair, especially during mobile aircraft detailing jobs.
Step 3: Fill Deeper Chips
If the chip is more than just surface level, we use TouchUpDirect Scratch and Chip Putty. It spreads easily and sands flat when cured.
Tip
Use a rubber glove and apply with your fingertip for better control than using a spreader. Let it fully cure before sanding.
Step 4: Feather the Edges
Using 800 to 1000 grit sandpaper, lightly sand the chip and surrounding area to feather the edges. The goal is to soften the transition so your touch up blends in.
Hack
Wrap the sandpaper around a pencil eraser or foam block. This gives you more precision in tight spots and avoids over-sanding the surrounding finish.
Step 5: Prime if Needed
If you’re looking at bare metal, apply a small amount of corrosion resistant primer. This primer we use for this is Rust-Oleum Stops Rust Reformer Spray Paint . It’s worth it.
Let it dry fully before painting. Skip this step if the base coat is still intact.
Tip
Priming is essential in any aircraft corrosion prevention detailing plan. A chip left unprimed will likely bubble under heat or humidity.
Step 6: Apply Paint in Light Layers
I use SYOAUTO Black Touch Up Paint when working on dark or black aircraft. For other paint systems, always match the original color code.
Apply using a fine brush, in light passes. Let each coat dry before the next. The key is subtle layering, not thick coverage.
Hack
Use a toothpick for ultra-fine chips. You’ll get better control than most built-in applicators.
Step 7: Polish and Protect
Once the paint has fully cured, polish the area lightly to blend the gloss level. I use a small foam pad and Polish All Aircraft Grade Paint.
Finish with airplane exterior waxing to protect the repair and keep the surface aerodynamic.
Tip
If the area takes frequent wear, apply jet paint protection film after waxing. It’s nearly invisible and protects high-traffic panels.
When to Call in a Professional
If the chip is on composite surfaces, next to rivets, or involves multiple layers of paint, I recommend bringing in someone certified with aviation detailing certification.
Most mobile aircraft detailing teams offer full packages that include small aircraft detailing, mid-size jet cleaning, and business jet appearance management. They often bundle interior services like cockpit detailing services, aircraft interior deep cleaning, or private jet leather conditioning.
Extra Tips from Experience
Keep your paint code in the hangar or saved on your phone. Saves time when ordering touch up supplies.
If your aircraft stays outside, apply a private jet ceramic coating on high-wear panels. It extends paint life and makes touch-ups easier.
Never rush curing time. If the paint isn't dry before polishing, you’ll lift it or create a hazy spot.
During inspections, check near turboprop exhaust outlets. That area chips and fades faster without protection.
Final Thoughts
Fixing paint chips takes less than an hour and prevents weeks of future work. Whether you're a private owner doing single engine airplane detailing or managing a full-service jet under business jet appearance management, this is a maintenance habit worth keeping.
With a few basic supplies, some tape, and steady hands, your aircraft will stay protected, polished, and ready for the ramp.
Contact
Get in touch for your airplane cleaning needs.
Support
Follow
contact@airplanewashpros.com
+1 619-383-5893
© 2025. All rights reserved.